Using the Interactive Documentation
Learn how to use our OpenAPI-based interactive documentation at docs.intelliscreen.io to test and explore the API endpoints.
Getting Started with the Docs
Our API documentation is built using OpenAPI specifications, providing you with an interactive interface to test endpoints directly from your browser.
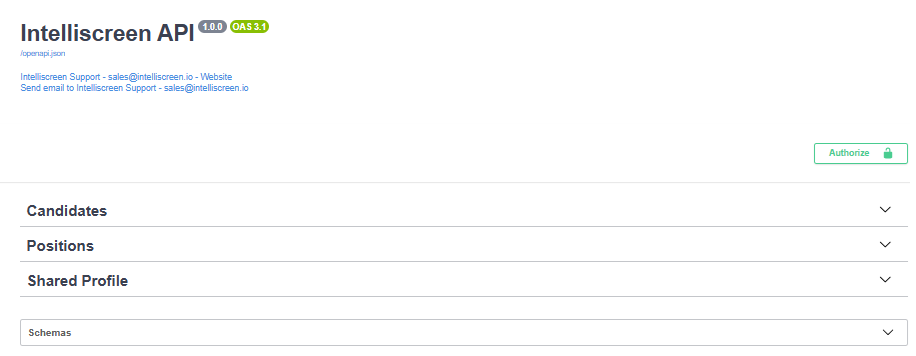 Overview of the interactive documentation interface
Authentication Methods
You have two options for authenticating with the interactive documentation:
Option 1: Global Authentication
- Locate the lock icon in the top right of the documentation page
- Click the lock icon to open the authentication dialog
- Enter your API key in the authentication field
- Click "Authorize" to authenticate all endpoints
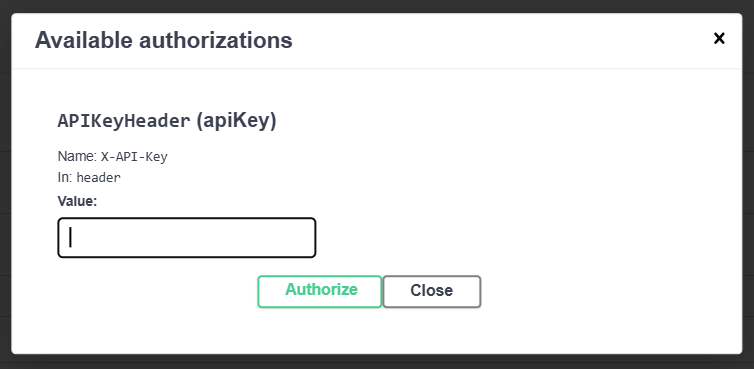 Authorize with your API key
Option 2: Individual Endpoint Authentication
- Navigate to any endpoint you want to test
- Look for the lock icon next to the endpoint located on the far right
- Click the lock icon for that specific endpoint
- Enter your API key to authenticate just that endpoint
![]() Authentication lock icon for individual endpoints
Authentication lock icon for individual endpoints
Testing Endpoints
Once authenticated, you can test any endpoint using the following steps:
Step 1: Select an Endpoint
Navigate to the endpoint you want to test from the documentation sidebar or main page.
Step 2: Try It Out
- Click the "Try it out" button on the desired endpoint
- This will enable the parameter fields for editing
 Location of the "Try it out" button on endpoint pages
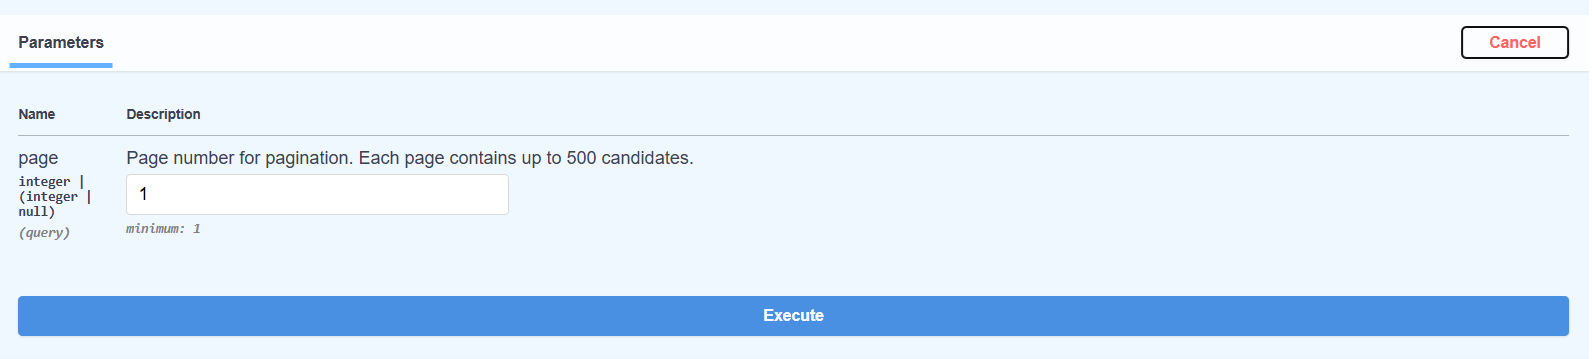
Step 3: Fill Required Information
- Review the required parameters for the endpoint
- Fill in the required fields with appropriate values
- Optionally fill optional parameters as needed for your test
Step 4: Execute the Request
- Click the "Execute" button to send the request
- View the response in the response section below
- Analyze the results including status code, response body, and headers
Understanding Responses
The interactive documentation shows you:
Response Information
- Status Code: HTTP status code (200, 404, 422, etc.)
- Response Body: The actual JSON response from the API
- Response Headers: Headers returned by the API
- Request Details: The exact request that was sent
Response Examples
Each endpoint includes example responses for different scenarios:
- Successful responses (200 status codes)
- Error responses (400, 404, 422, 500 status codes)
- Different response formats based on the endpoint
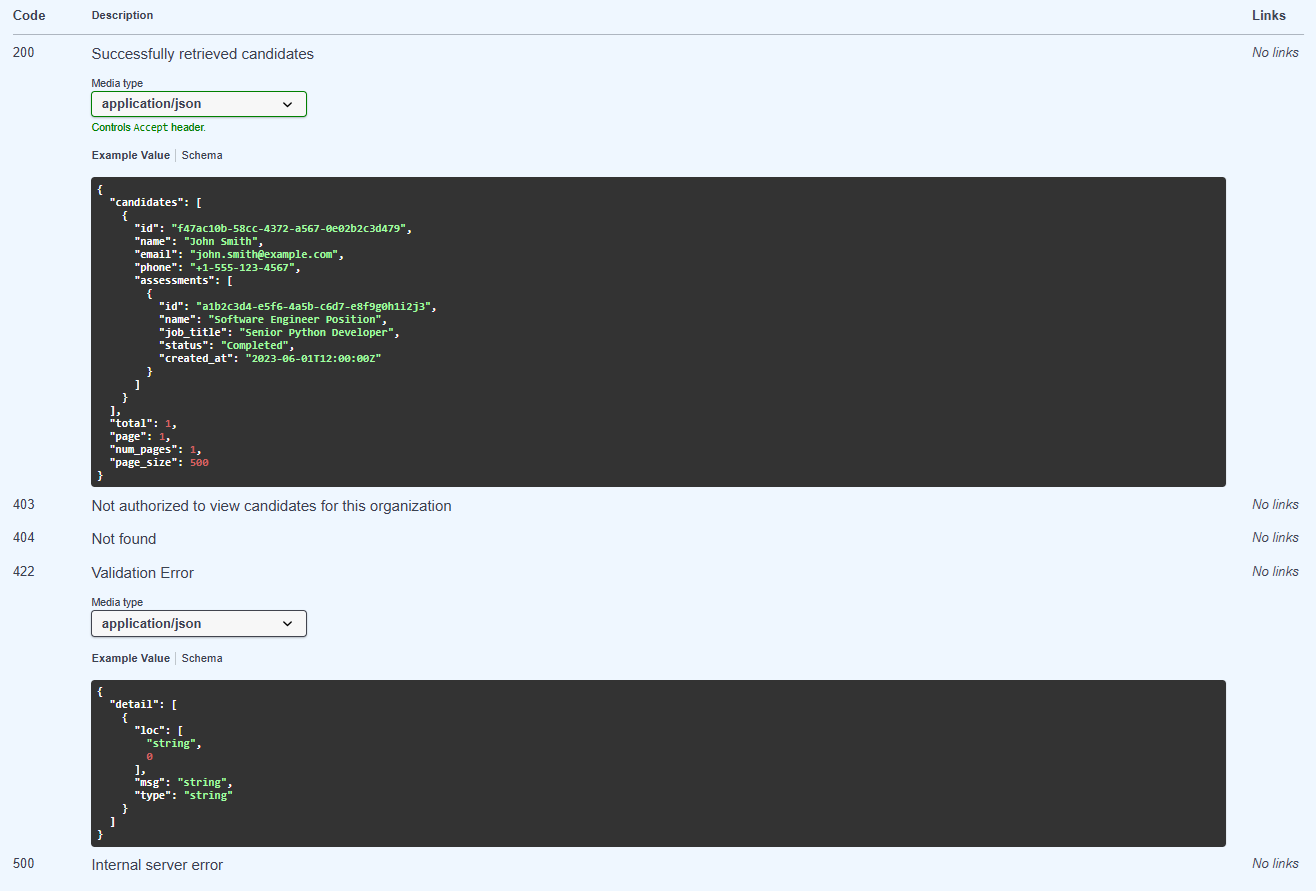 Example response formats shown in the documentation
Common Testing Scenarios
Testing GET Endpoints
- Authenticate using your preferred method
- Click "Try it out" on the GET endpoint
- Fill any required path parameters (like
candidate_id) - Click "Execute" to retrieve data
Testing POST Endpoints
- Authenticate and click "Try it out"
- Fill required parameters and request body
- For file uploads, use the file selection interface
- Click "Execute" to submit data
Testing with Query Parameters
- Look for query parameters in the parameters section
- Fill optional query parameters like
pagefor pagination - Execute to see how parameters affect the response
Using the API Outside the Interface
When integrating the API into your own applications (outside of this OpenAPI interface), you'll need to manually include your API key in the request headers.
Required Headers
Every API request must include these headers:
X-API-Key: YOUR_API_KEY_HERE
Content-Type: application/json
cURL Example
curl -X GET "https://api.intelliscreen.io/candidates/" \
  -H "X-API-Key: YOUR_API_KEY_HERE" \
  -H "Content-Type: application/json"
JavaScript Example
const response = await fetch("https://api.intelliscreen.io/candidates/", {
  method: "GET",
  headers: {
    "X-API-Key": "YOUR_API_KEY_HERE",
    "Content-Type": "application/json",
  },
});

const data = await response.json();
Python Example
import requests

headers = {
    'X-API-Key': 'YOUR_API_KEY_HERE',
    'Content-Type': 'application/json'
}

response = requests.get('https://api.intelliscreen.io/candidates/', headers=headers)
data = response.json()
Important: Replace YOUR_API_KEY_HERE with your actual API key from your account dashboard.
Tips for Effective Testing
Parameter Testing
- Start with required parameters: Always fill required parameters first
- Test edge cases: Try boundary values and edge cases
- Use realistic data: Use realistic candidate emails, names, and IDs
Error Testing
- Test invalid data: Try invalid IDs or malformed requests
- Check permissions: Test endpoints you may not have access to
- Verify error messages: Ensure error responses are helpful
Response Validation
- Check status codes: Verify you're getting expected status codes
- Validate response structure: Ensure response matches the schema
- Test pagination: For paginated endpoints, test different page numbers
Troubleshooting Common Issues
Authentication Problems
- Double-check your API key: Ensure it's correctly copied
- Try both auth methods: If global auth fails, try individual endpoint auth
- Check for expired keys: Regenerate your API key if needed
Parameter Issues
- Required vs optional: Ensure all required parameters are filled
- Data types: Match the expected data types (string, integer, etc.)
- Format validation: Follow any specified formats for parameters
Network Issues
- Check your connection: Ensure you have a stable internet connection
- Try different endpoints: Test if the issue is endpoint-specific
- Clear browser cache: Sometimes cached data can cause issues